 The family visited White House Fruit Farm this last week so we could pick our own blueberries. The blueberries were HUGE! This year we also picked strawberries at White House in mid-June and we were able to pick peaches at Martin Farm & Winery in Knotts Island, NC while vacationing this summer. Pics or it didn't happen, you say? See below! White House has so many fun things throughout the year. Stay up-to-date via their facebook page here! Do you have any suggestions for local orchards where we can go apple picking?! 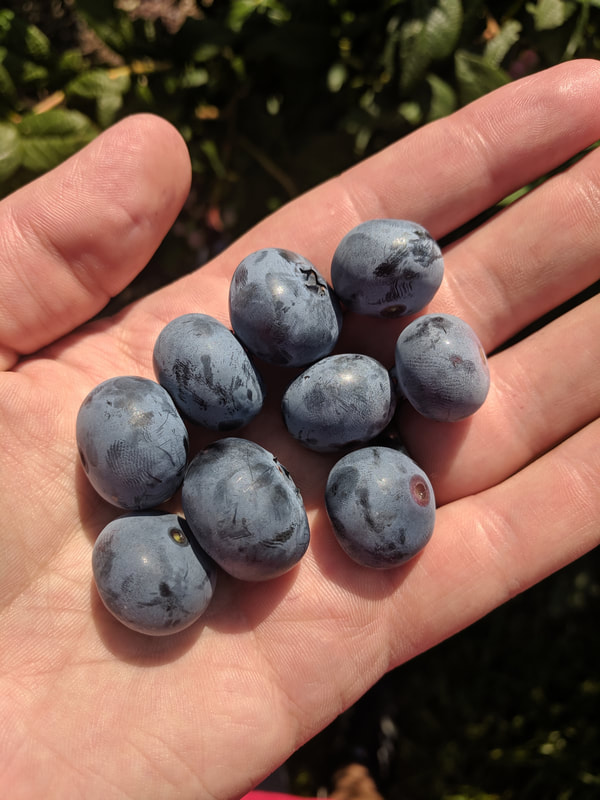  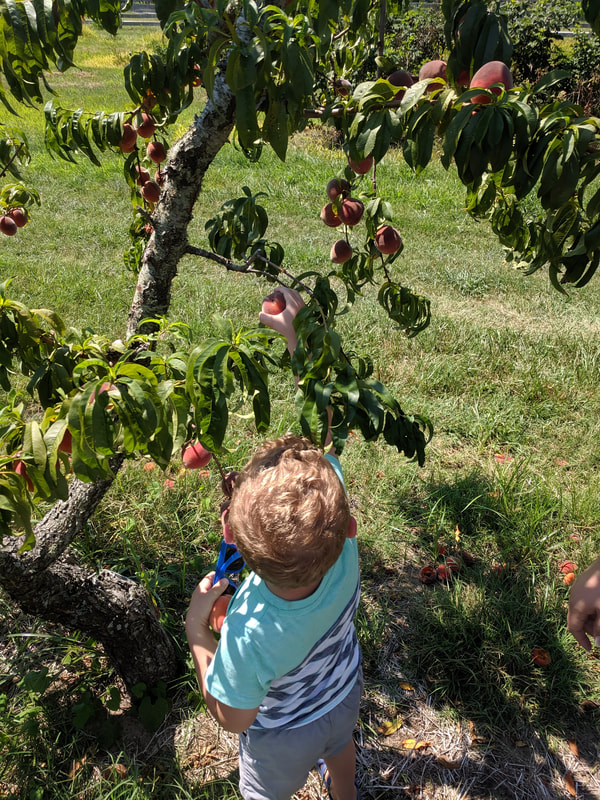 Back to talking blueberries... I think we picked about 6 pounds and I'm sure my little man snacked on some blueberries in the field. We decided not to make jelly with them this year, but still wanted to make something. Due to a little social media peer pressure from my brother-in-law, I decided to make a dessert with my daughter. Here is a picture of all the ingredients you need, dirtying way too many dishes! And yes, that is a lemon. Mmmmmm! 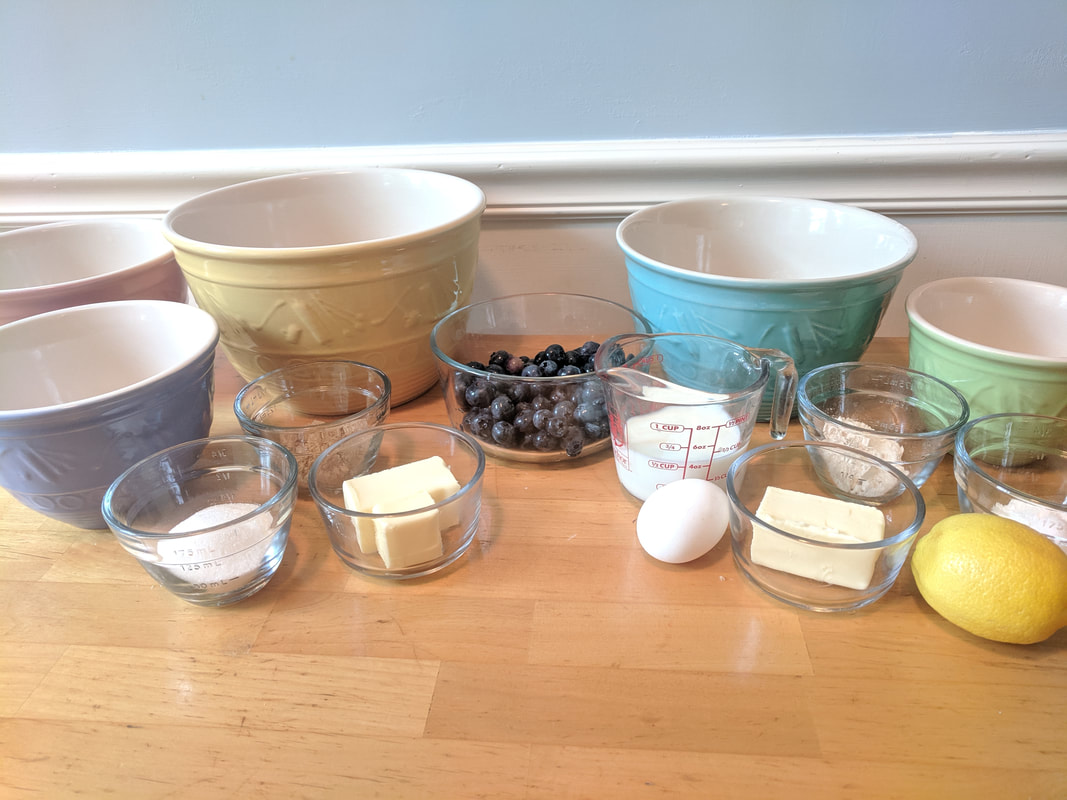 Full Shopping List (includes batter and topping):
Total Cost: Under $10 (blueberries in season) Prep Time: 60 mins Pre-heat your oven to 350 degrees to begin! For the batter, you'll need two bowls of ingredients in addition to the milk and blueberries:
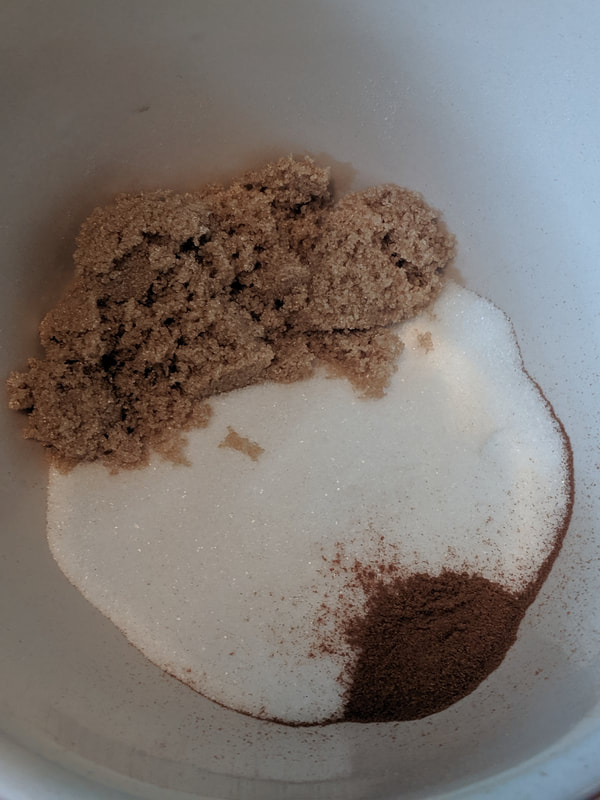
Cream the first bowl of ingredients together. This bowl includes the sugar, butter, egg, and lemon zest. 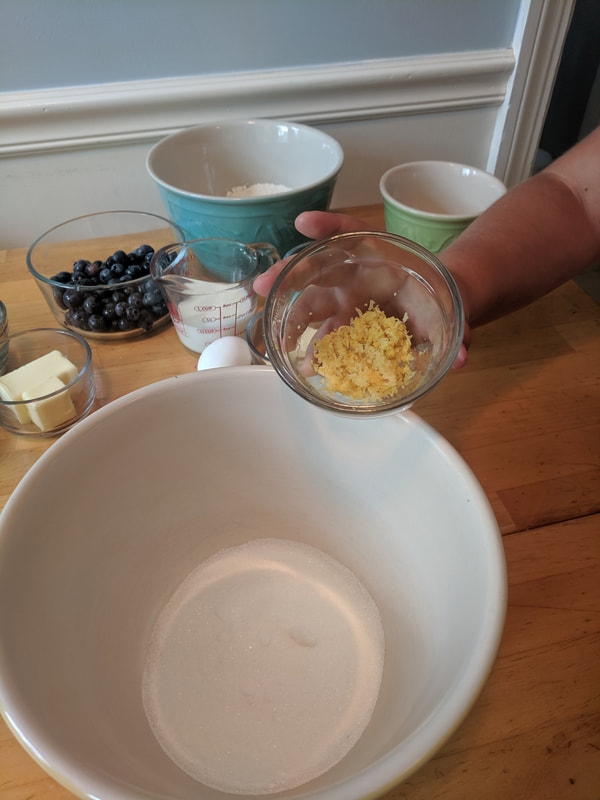  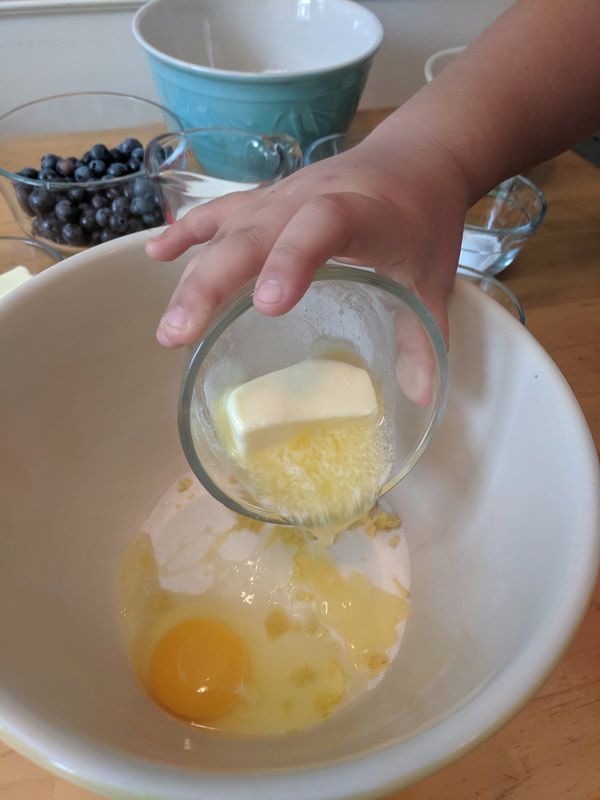 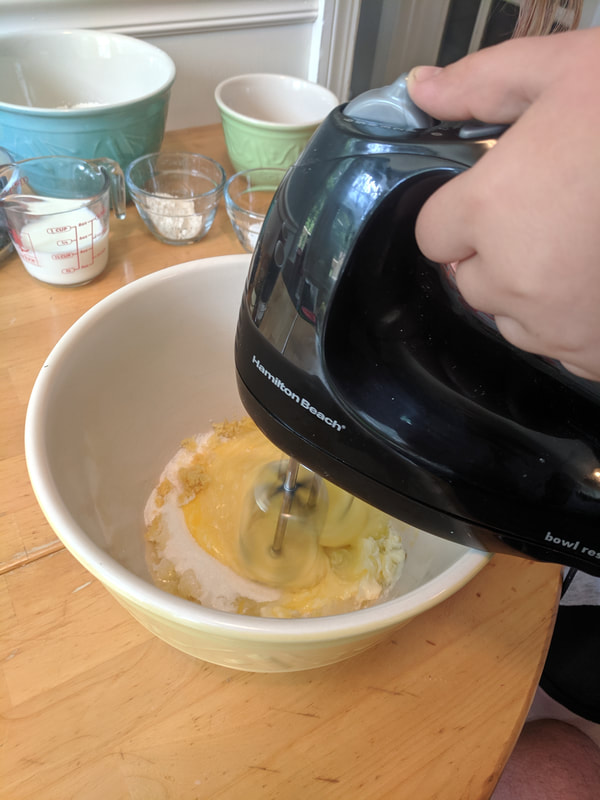 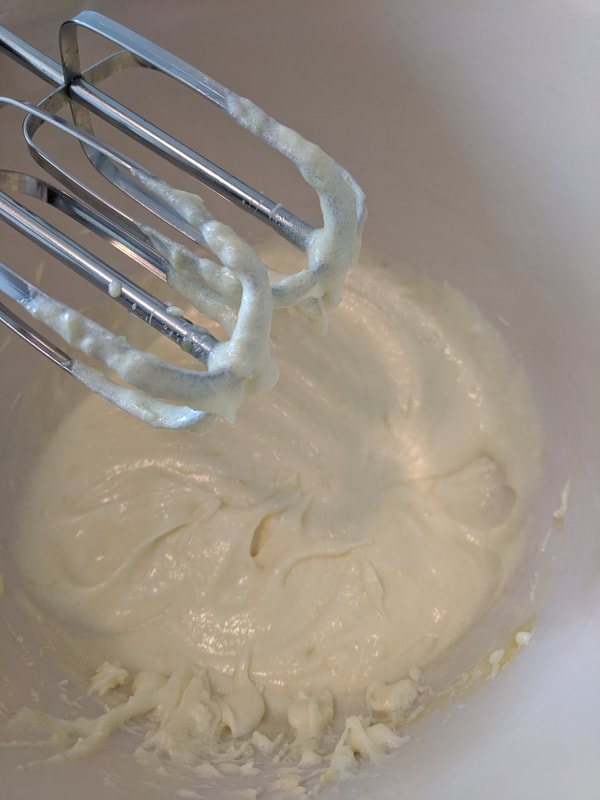 Simply mix the second bowl of dry ingredients together. This bowl includes flour, baking powder, and salt. 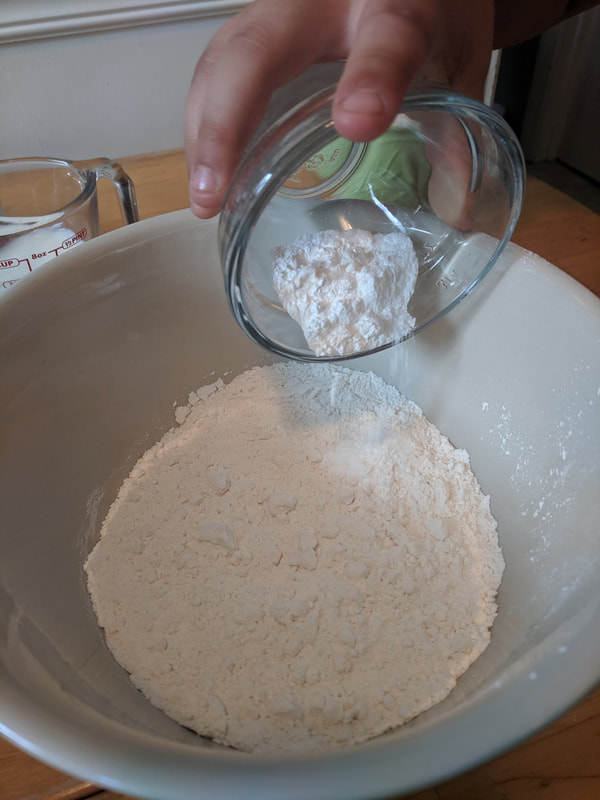 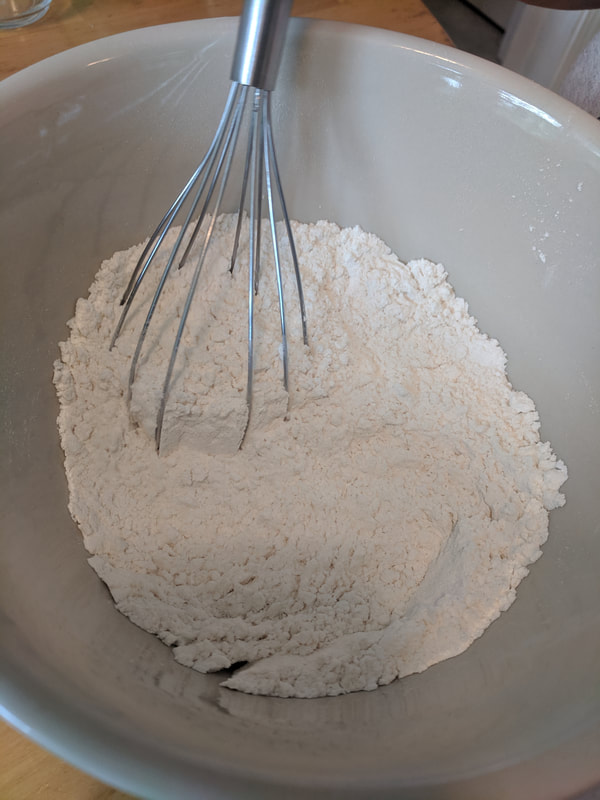 Mix the dry ingredients and the 1/2 cup of milk into the wet sugar mixture. Don't over mix. Stop when all ingredients are blended together. In the words of my daughter, stop when it looks like play-doh. 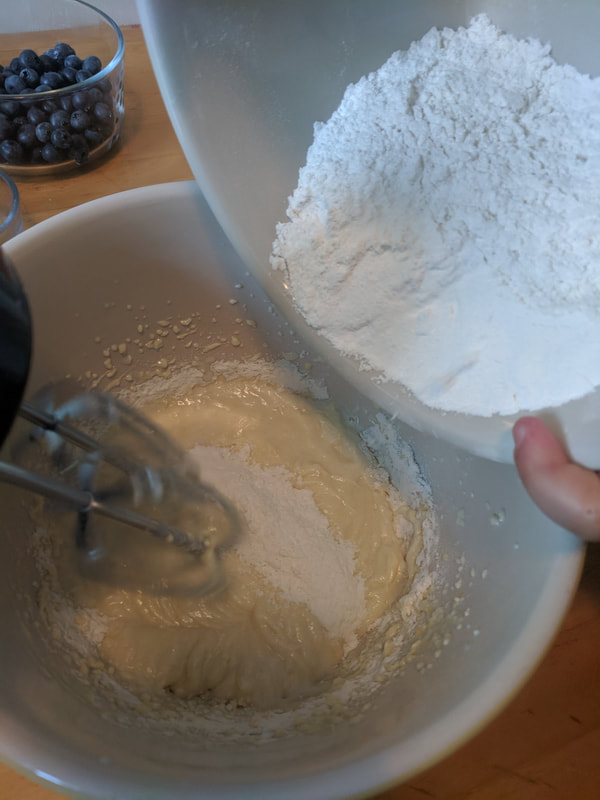 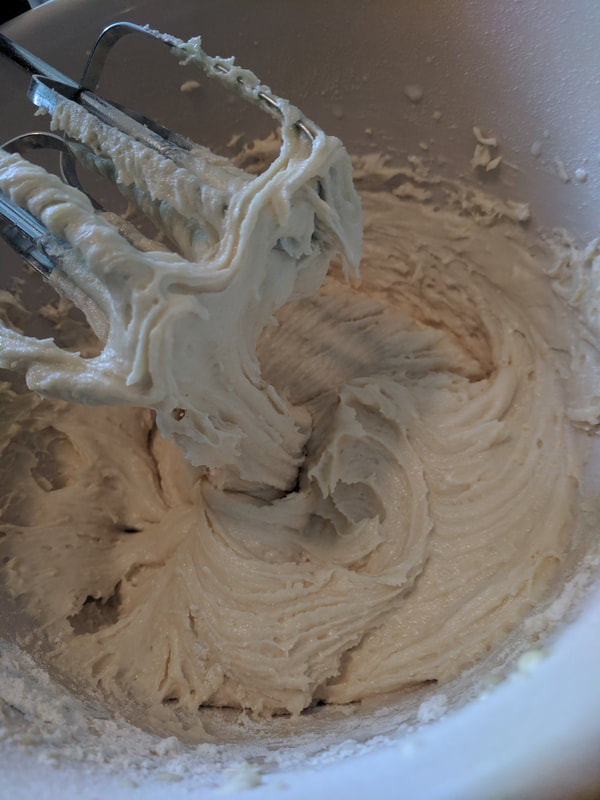 Pro-Tip: Before folding in the blueberries, toss them in 1 tablespoon of flour. This will help them from sinking to the bottom of the batter. 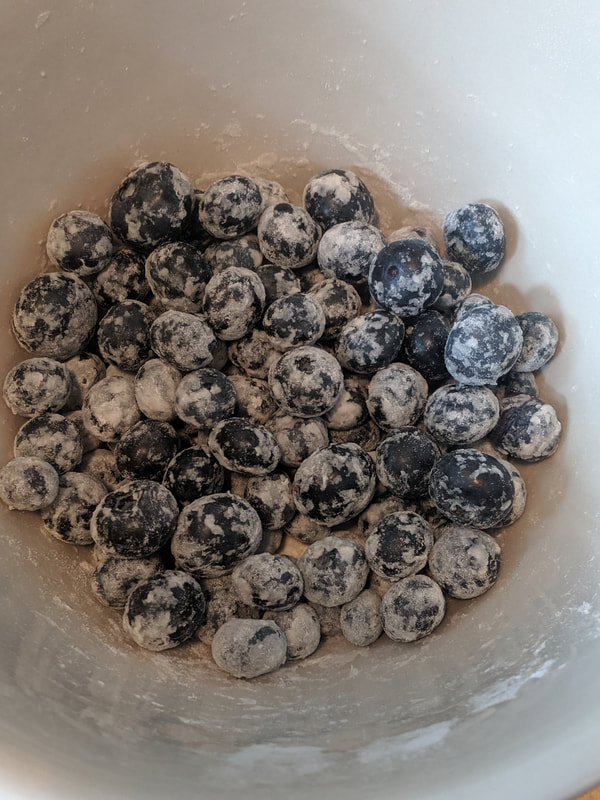 Now fold in the blueberries and move the batter mixture into a greased 8x8 pan. 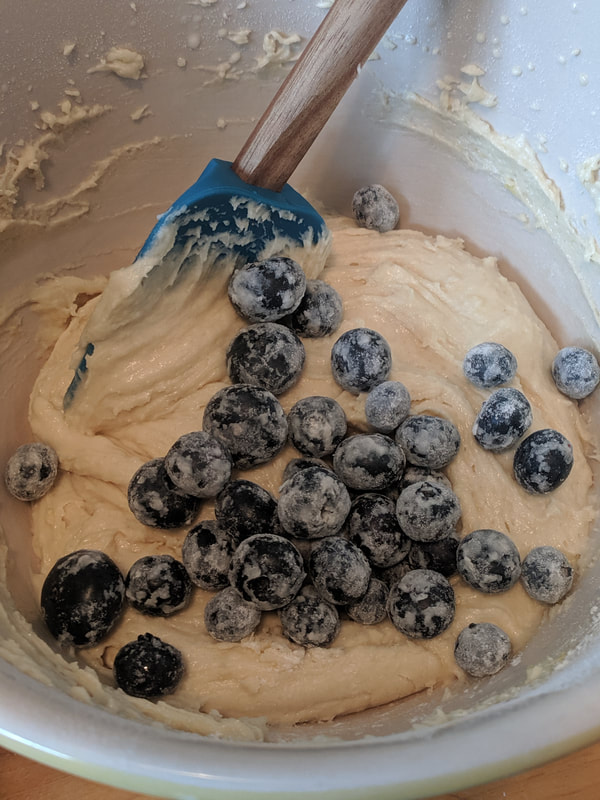  Time to make the topping. Mix the following ingredients together:
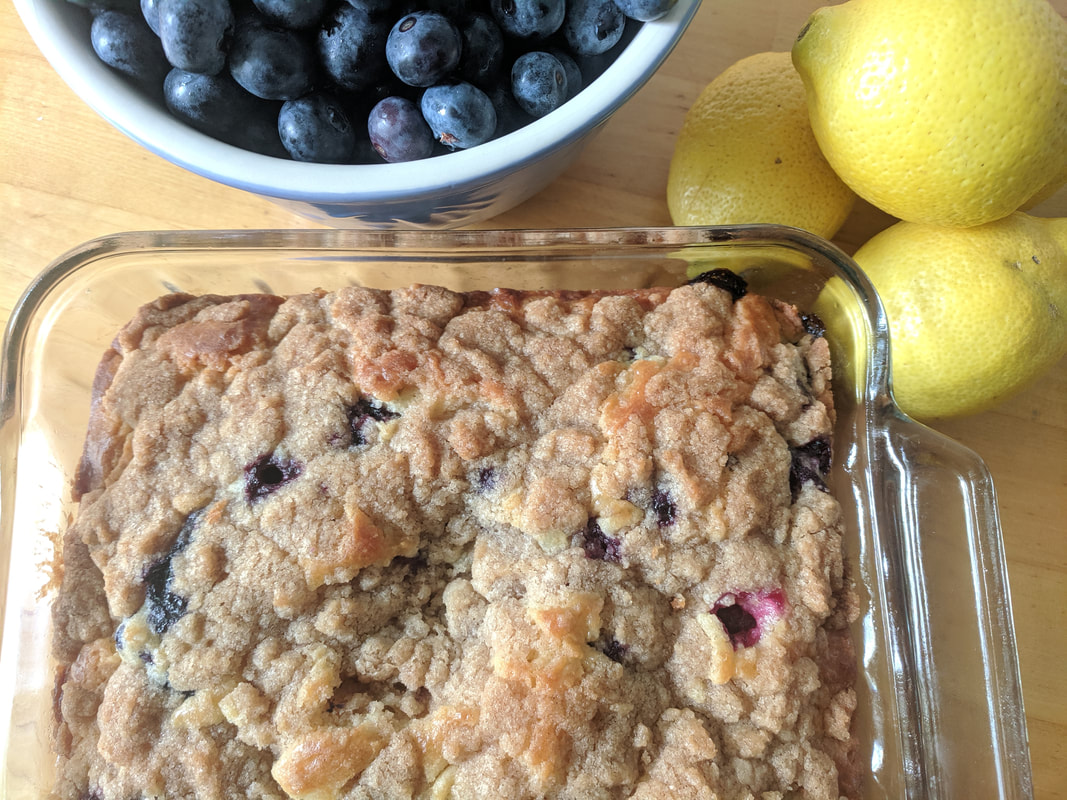
 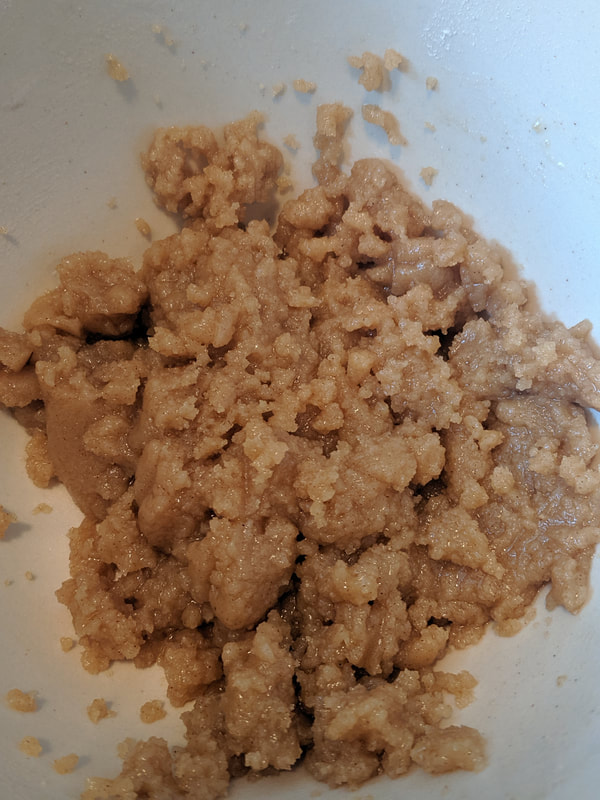 Crumble/scatter the streusel topping on the top of the batter in the 8x8 pan. Put the dessert into the oven for 45 minutes. 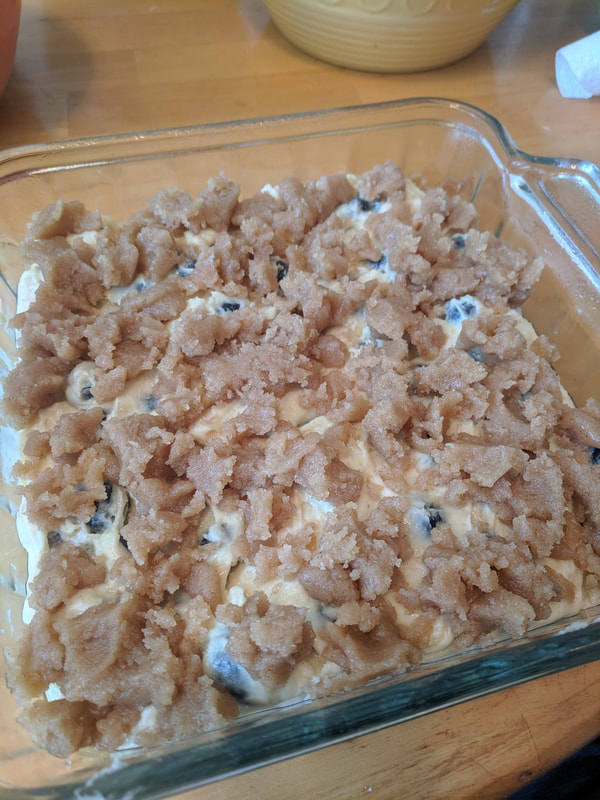 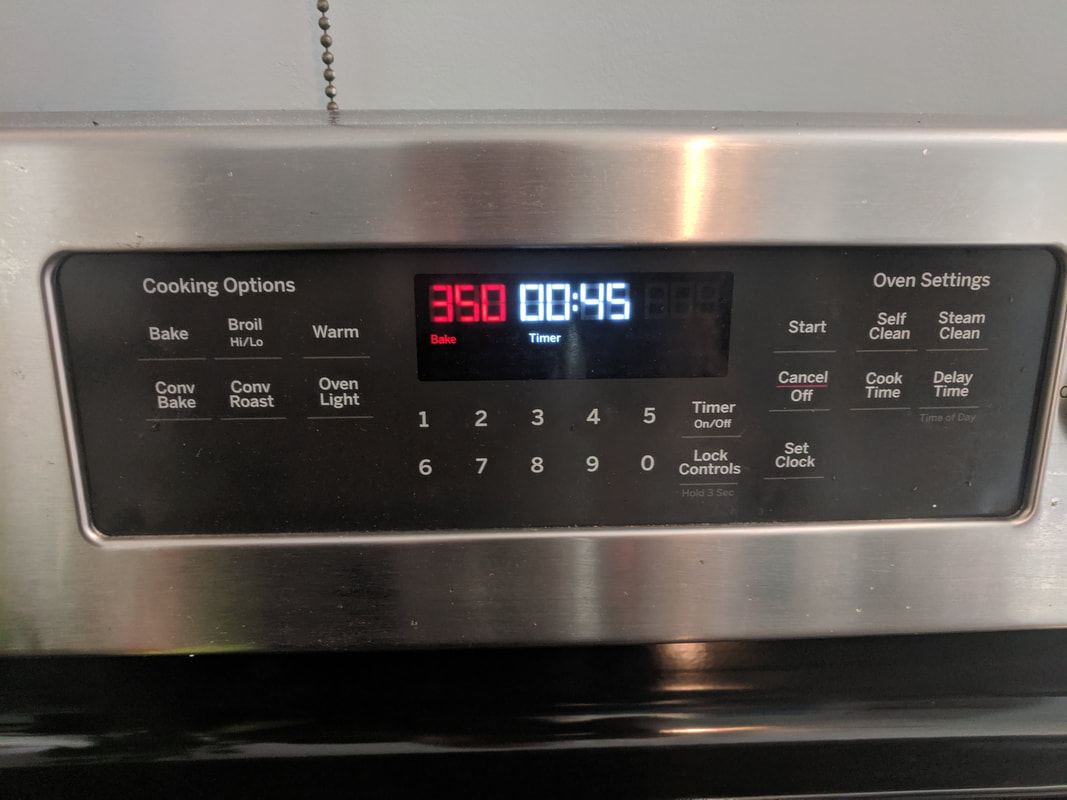 Check with a toothpick or fork to ensure it is fully cooked. 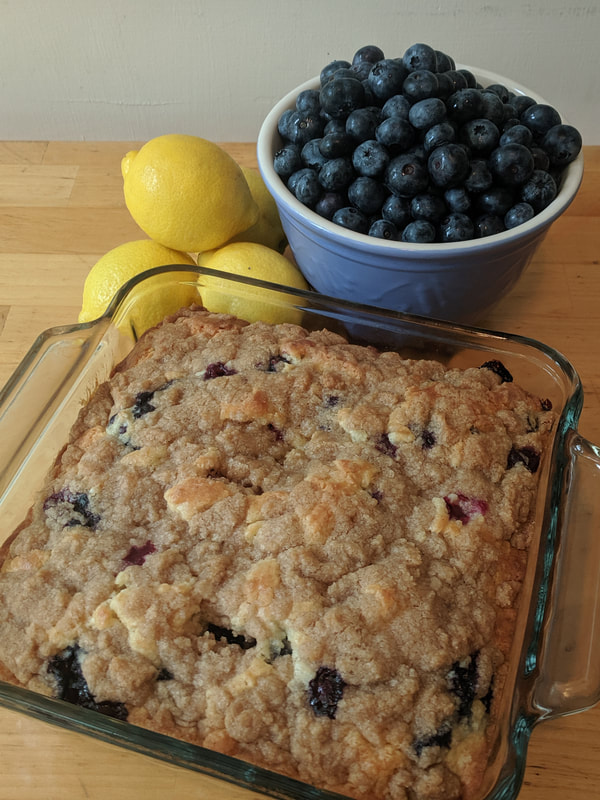 This coffeecake dessert could also be served with a lemon drizzle icing or cool vanilla ice cream. And of course with a nice hot cup of coffee. Enjoy! 
1 Comment
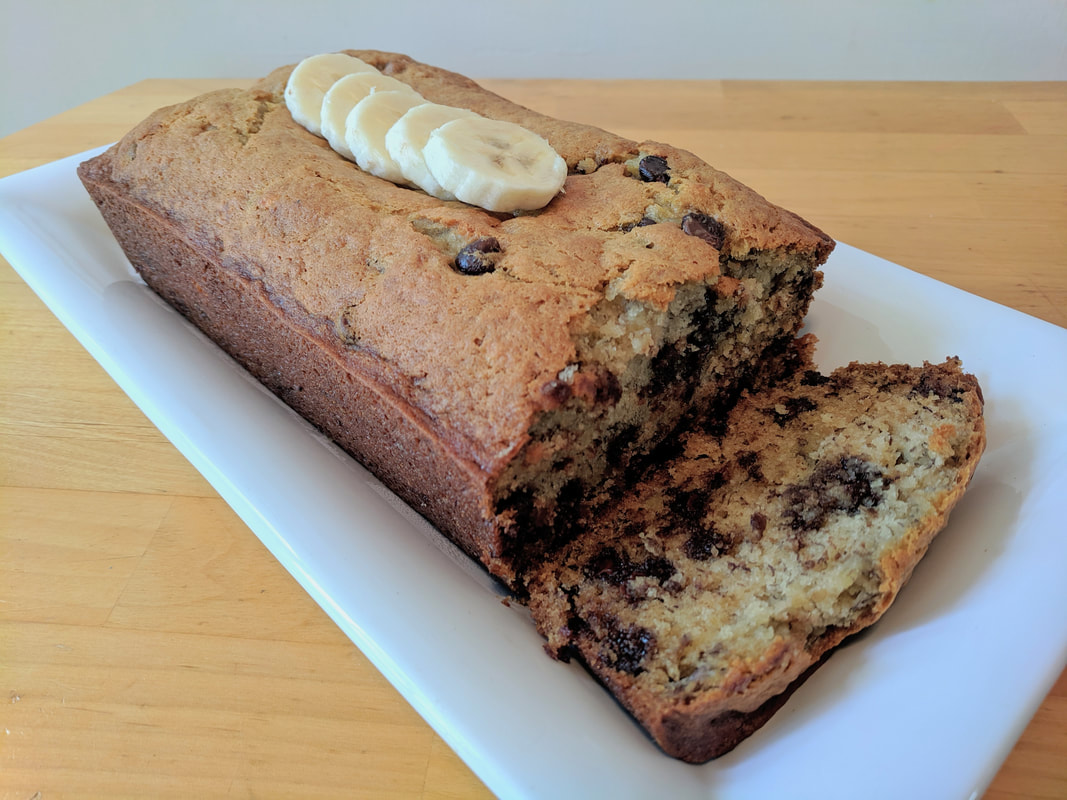 We have a fruit bowl in our kitchen that the kids can graze from any time they want a snack. Some months we cannot keep enough clementine oranges in supply and other months we are buying 2 or 3 bunches of bananas each week. Right now, our kids are on a banana kick. This morning I noticed the last few in the bunch started getting a little spotty; still perfectly fine for my peanut butter and banana toast breakfast, but I took the opportunity to use the last three bananas for some delicious banana bread! You may notice an additional set of small hands because I gained another little helper this round. He was upset he didn't get to help with the pickled eggs.  Pictured above are all my ingredients. Note: you can skip the chocolate chips or substitute for another ingredient, like walnuts! Because we're baking in this blog, I have to be a little more specific with my measurements instead of my anti-measuring cup, "glass-full" portions. I still try, as much as I can, to use same-size measurements for multiple ingredients which uses less dishes. You can probably get away with 3-4 dishes total (large mixing bowl, small mixing bowl, 1 cup, and 1 teaspoon). Shopping List:
Total Cost: Under $15 Prep Time: 75-80 mins Instructions: 1- Preheat oven to 325 degrees. 2- Mash up bananas in large mixing bowl. 3- Melt stick of butter in microwave for 30 seconds. 4- Beat the two large eggs in small bowl. 5- Mix both butter and eggs to the smashed bananas in large mixing bowl. Mix in sugar. 6- Add baking powder, baking soda, vanilla, and salt. Mix together. 7- Carefully mix in flour 8- Fold in chocolate chips. 9- Pour mixture into lightly greased non-stick loaf pan. 10- Bake in oven for approximately 1 hour. 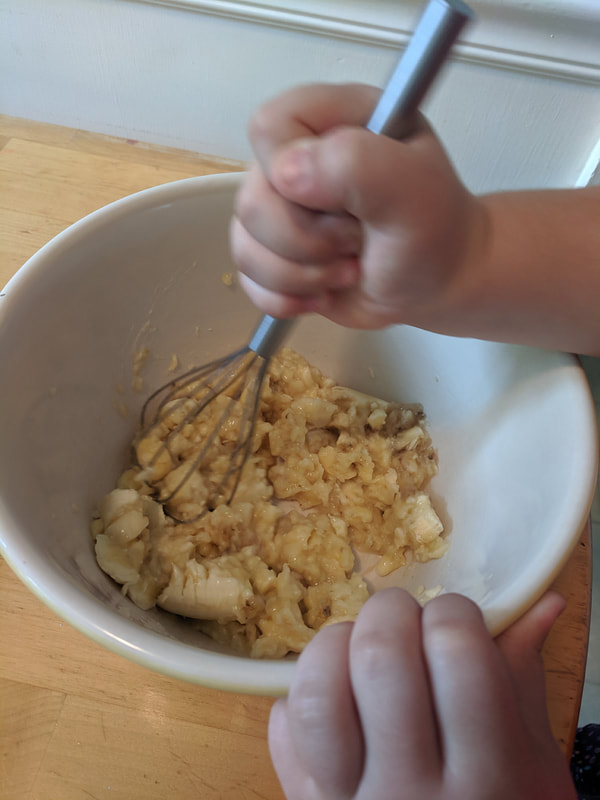 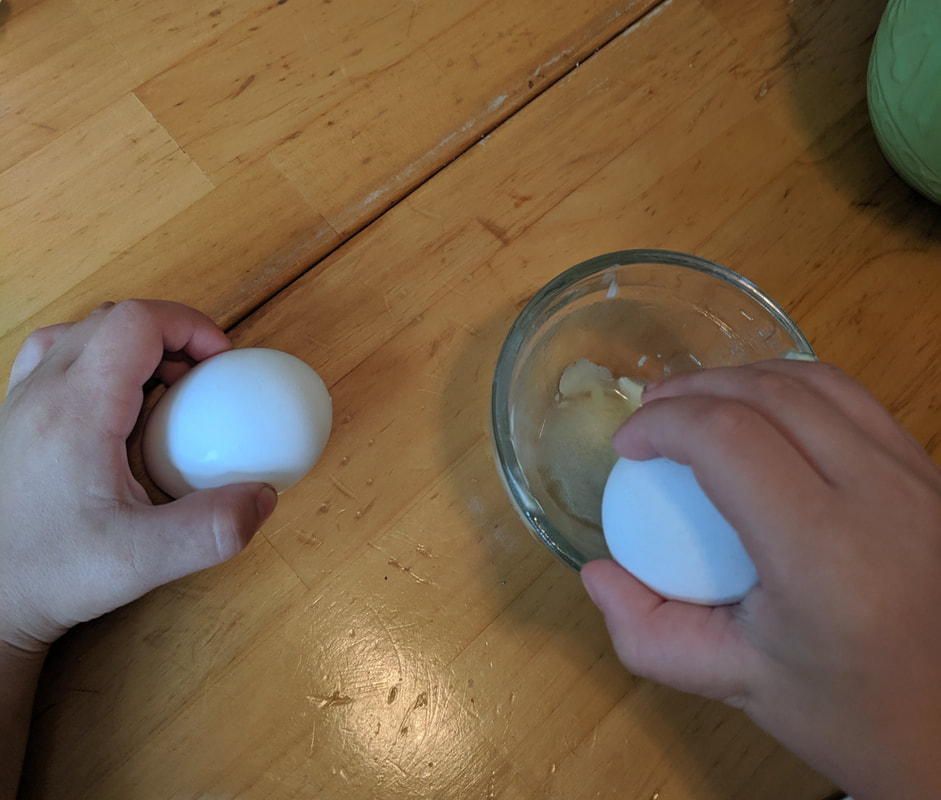 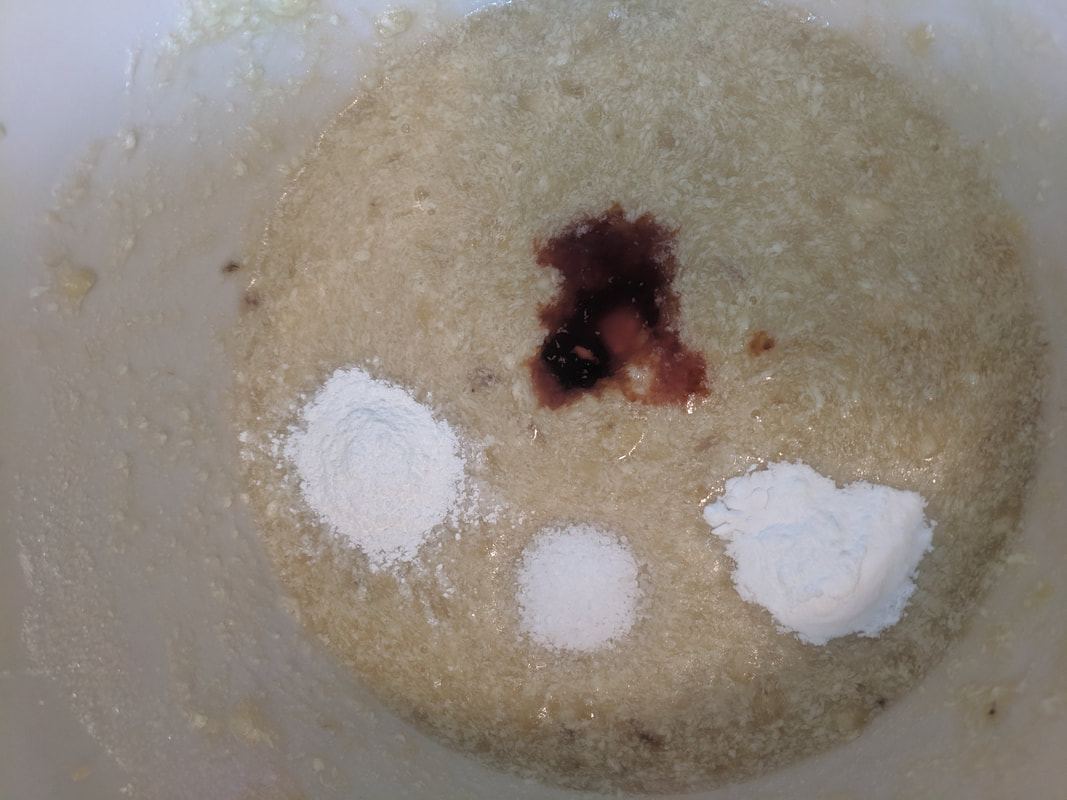 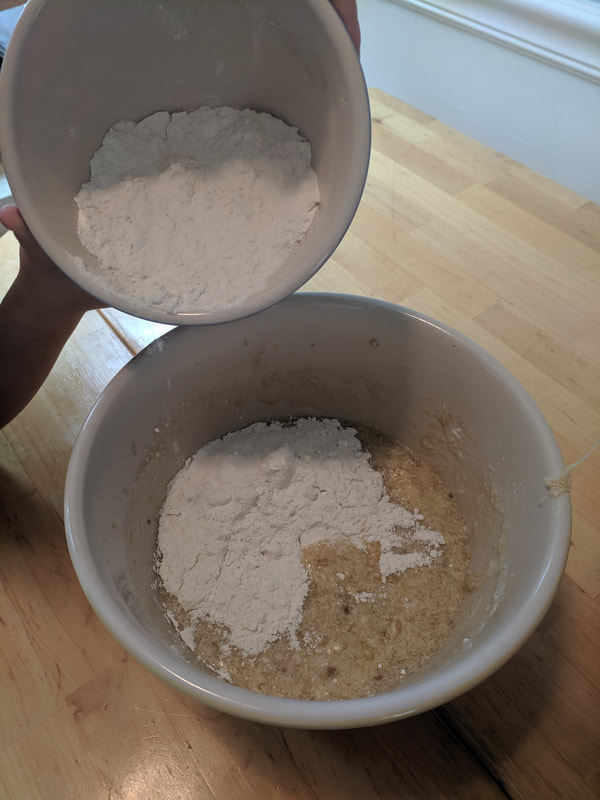 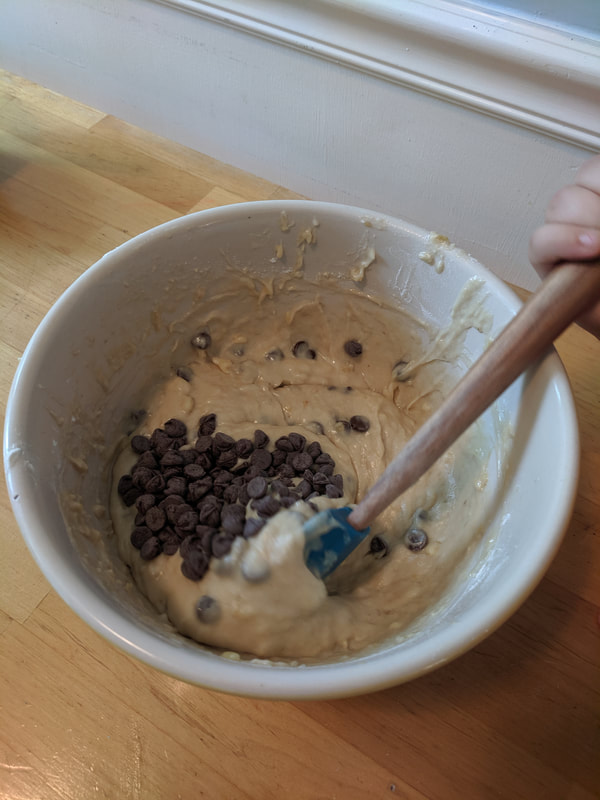 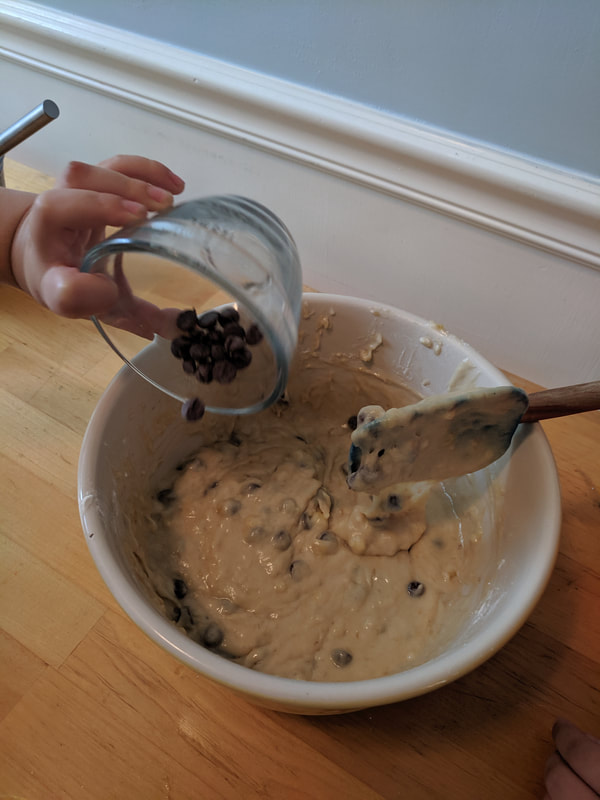 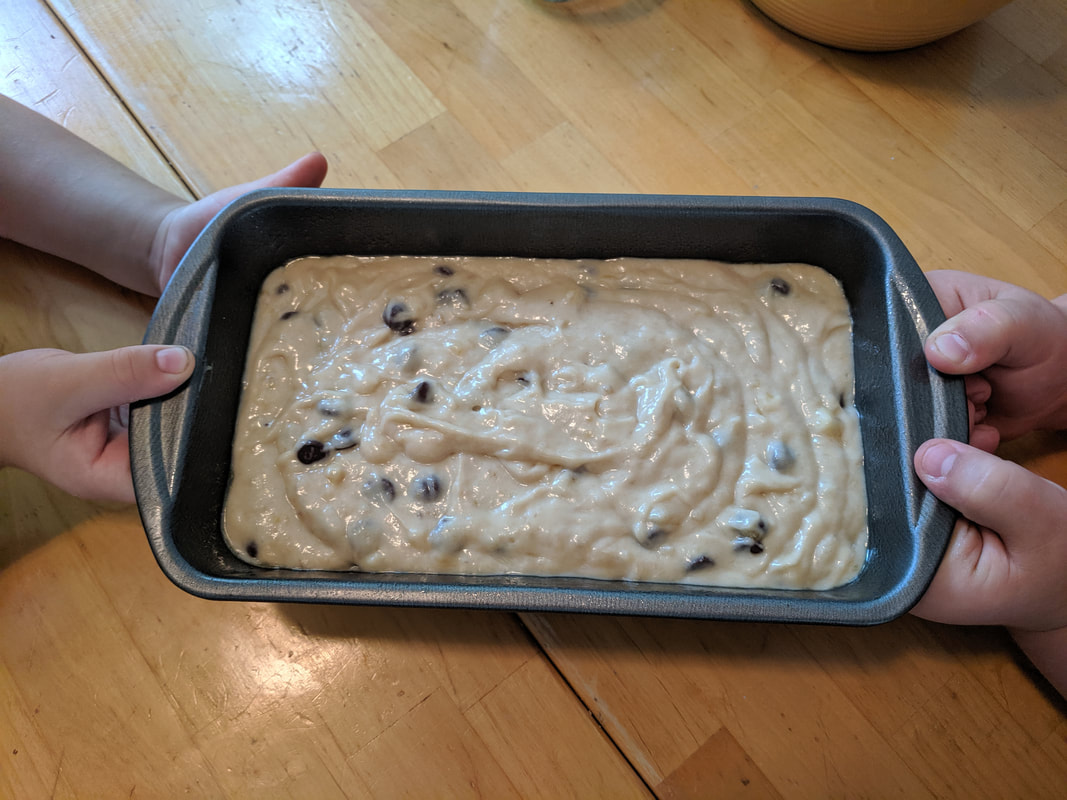 When baking, I put it in for 55 minutes to begin. I use the "fork test" to see if it is fully cooked. Place a fork in the top of the bread. If there is batter stuck to the fork after removing it, leave the loaf pan in the oven for an additional 3-4 minutes. Keep repeating the process until fully cooked. 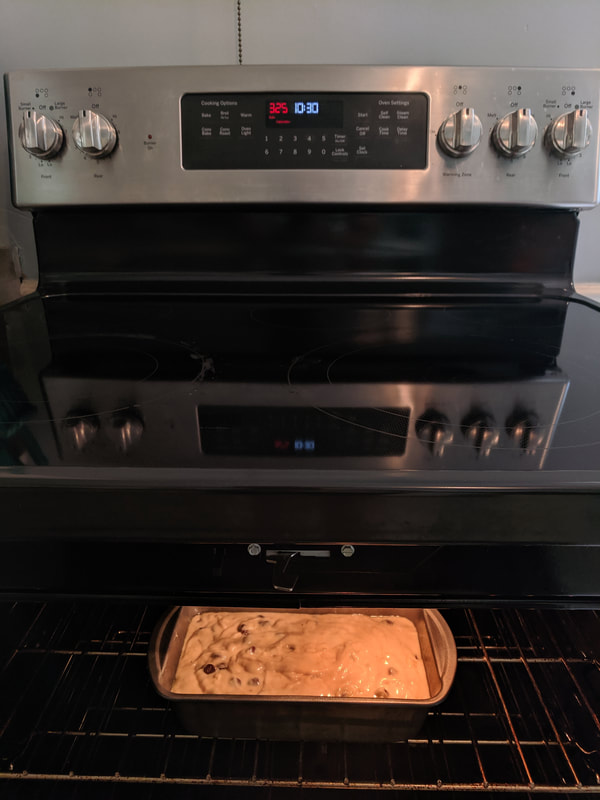 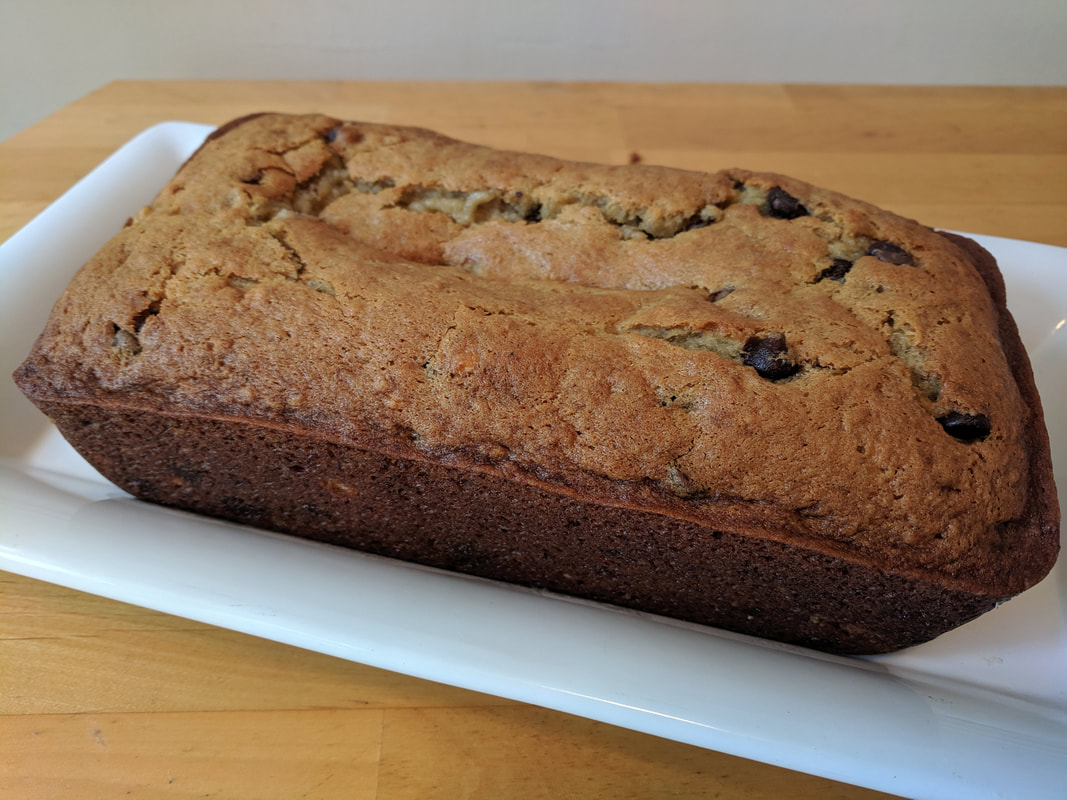 If you're cooking with kids, you will need one other ingredient you unfortunately cannot buy at the store: patience! I hope you enjoy our not-so-healthy chocolate chip banana bread recipe. I know our kiddos do! 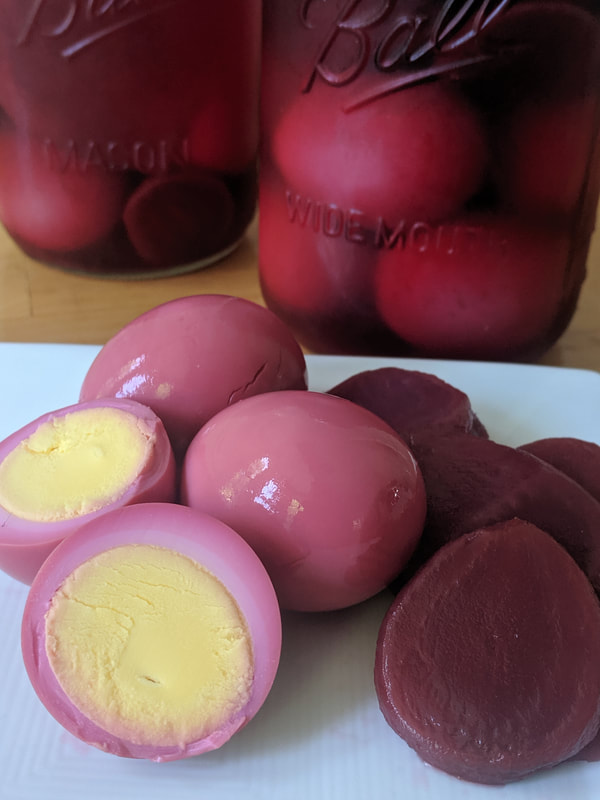 There are many recipes for pickled eggs online, but many left me wanting more flavor. This recipe is made for vinegar lovers, however it can easily be adapted to a more diluted flavor if that's your style. The other reason I like this recipe is because you don't have to wait several days until the eggs are ready. You can eat these delicious eggs within 24 hours without compromising any flavor! We'll first demonstrate how to make the perfect hard-boiled eggs and then finish off the recipe blog with our pickling process. Shout-out to my guest cook and favorite daughter who helped with this batch of pickled eggs! 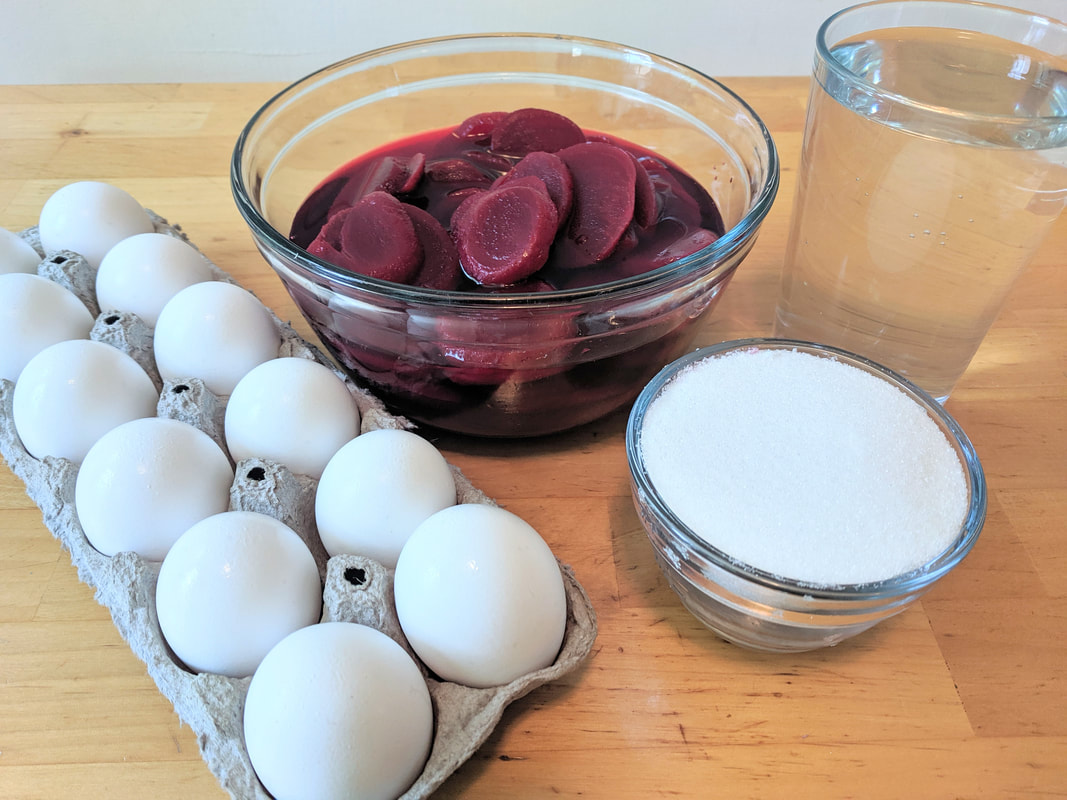 To continue with the spirit of easy recipes, here is what you need: Shopping List:
*For this recipe, I used two cans of pickled sliced beets. If you want less flavor, you can buy sliced beets that are not pickled. Total Cost: Under $5 Prep Time: 45-50 minutes Instructions: 1- Place the dozen eggs into a pot of cold water. 2- Cover the pot and cook on stove on high. 3- Once the water comes to a boil (approx 10 minutes), turn off the heat and let stand for an additional 12 minutes. 4- After that time, scoop eggs out of the hot water and immediately place them into a large bowl of cold water.. 5- Leave for at least 10 minutes. After the eggs have cooled, you can peel the eggs to prepare for pickled eggs. 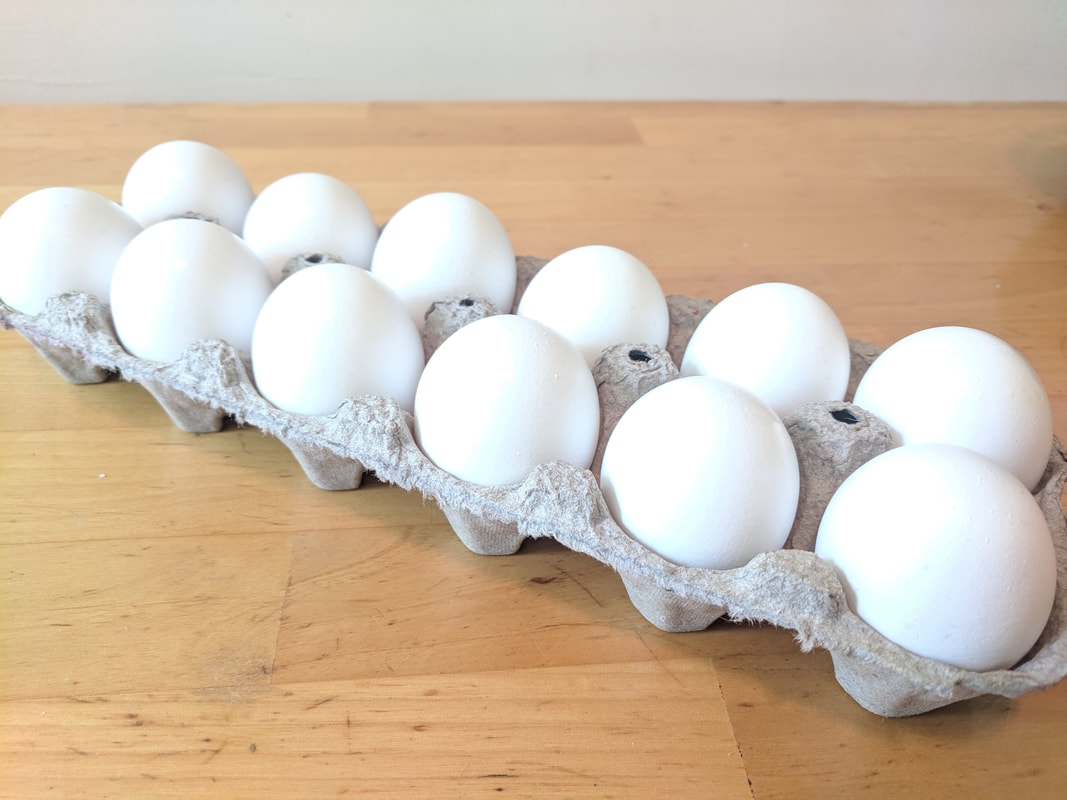 Pro Tip: Don't use super fresh eggs. Eggs peel better after they have sat in the fridge for a week. 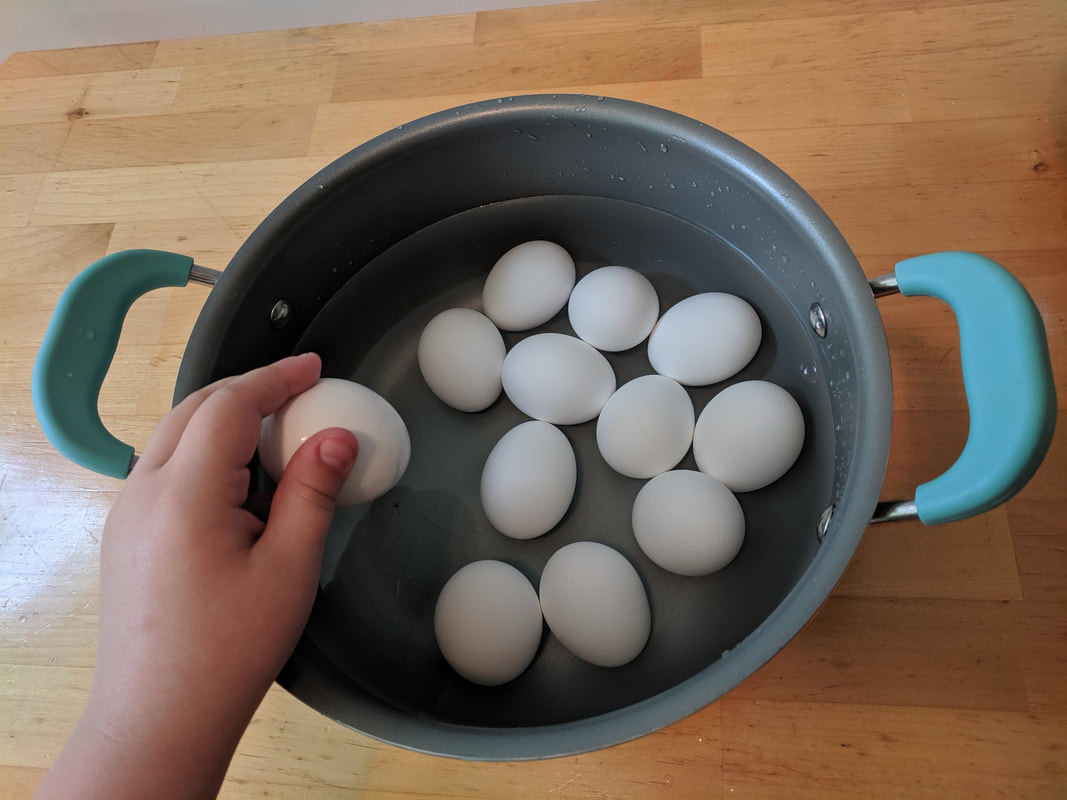 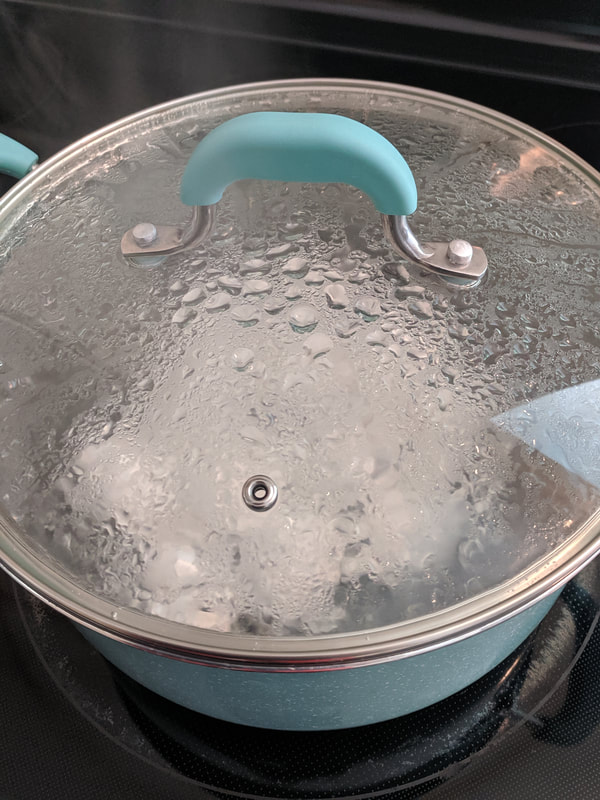 Pro Tip: Add some salt to the cold water before boiling. It helps increase the temperature of the water for better cooking and it helps the eggs from cracking. 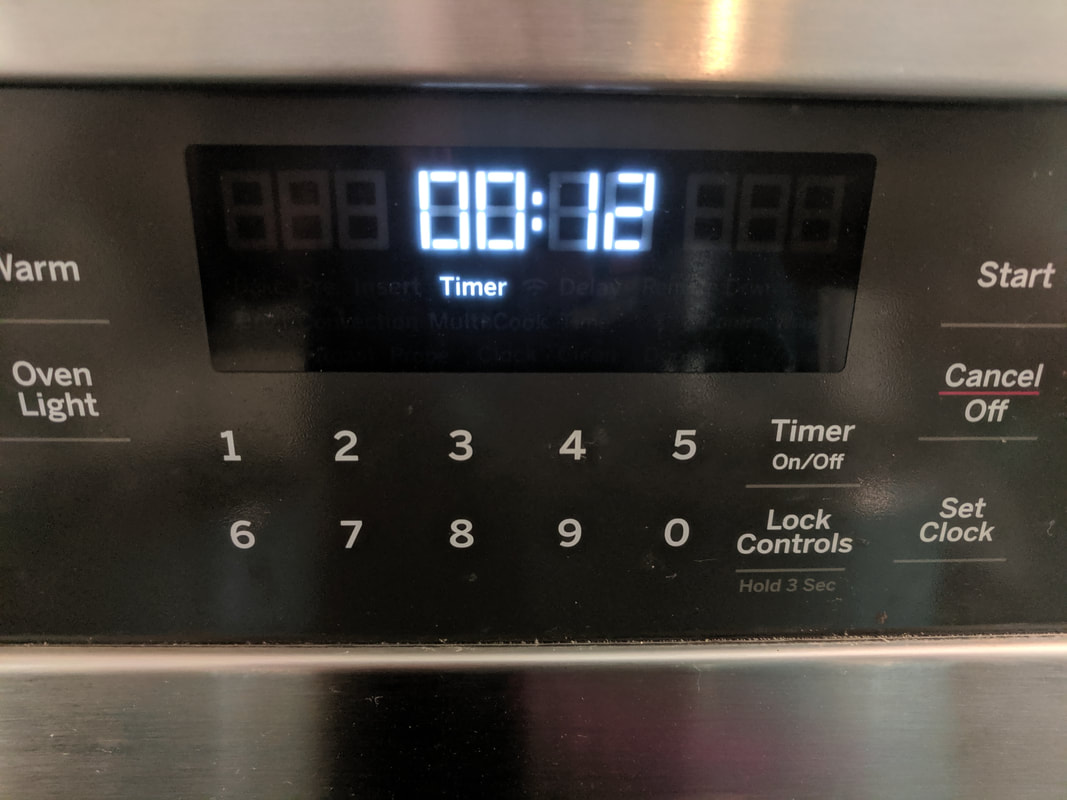 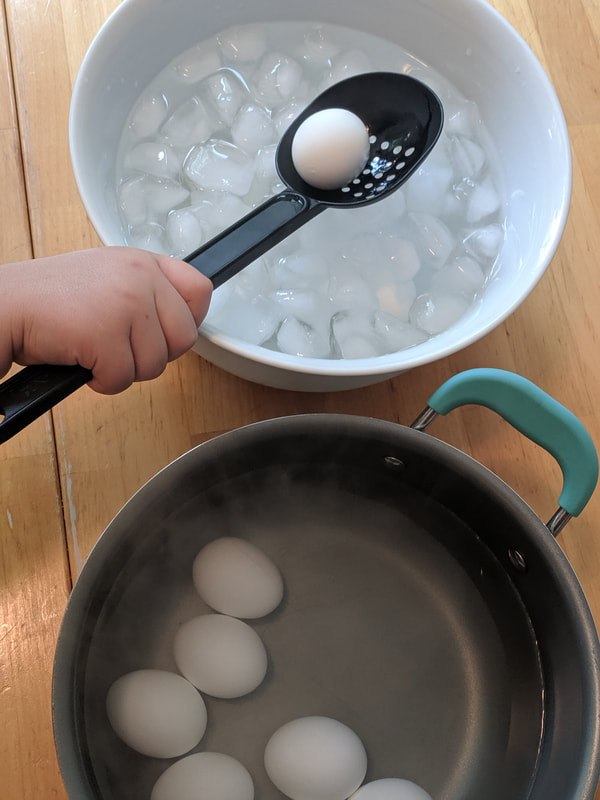 Pro Tip: While waiting on the eggs to boil, get the large bowl of cold water ready.. Use a lot of ice! 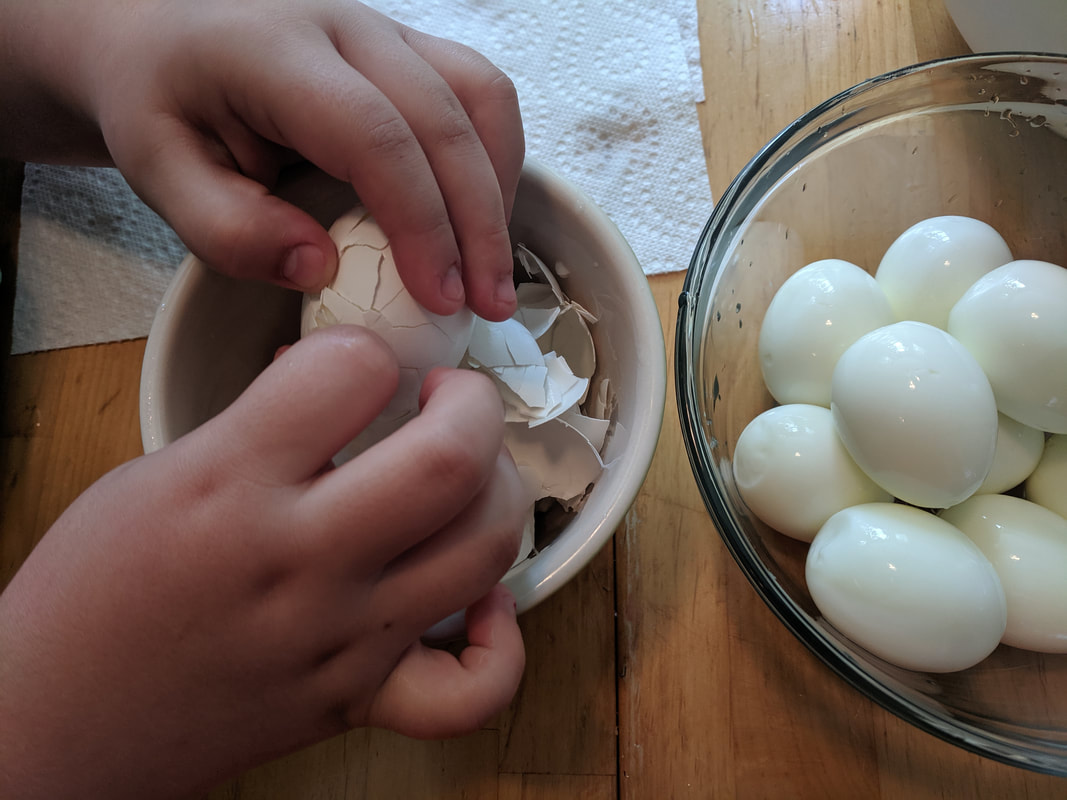 Once you have your dozen of hard-boiled eggs peeled, it is now time to pickle the eggs with beets! Instructions continued: 6- In a medium saucepan, carefully add beets, vinegar, and sugar. Mix all the ingredients together. 7- Place on stove on high. Bring the mixture to a boil (approximately 10 minutes). Be sure to stir every 2-3 minutes. 8- After the beets and juice begin to boil, turn off the heat and set aside to begin to cool. 9- Divide up the dozen eggs into a few canning jars and pour the beets and juice on top. 10- Refrigerate for 24 hours and enjoy! 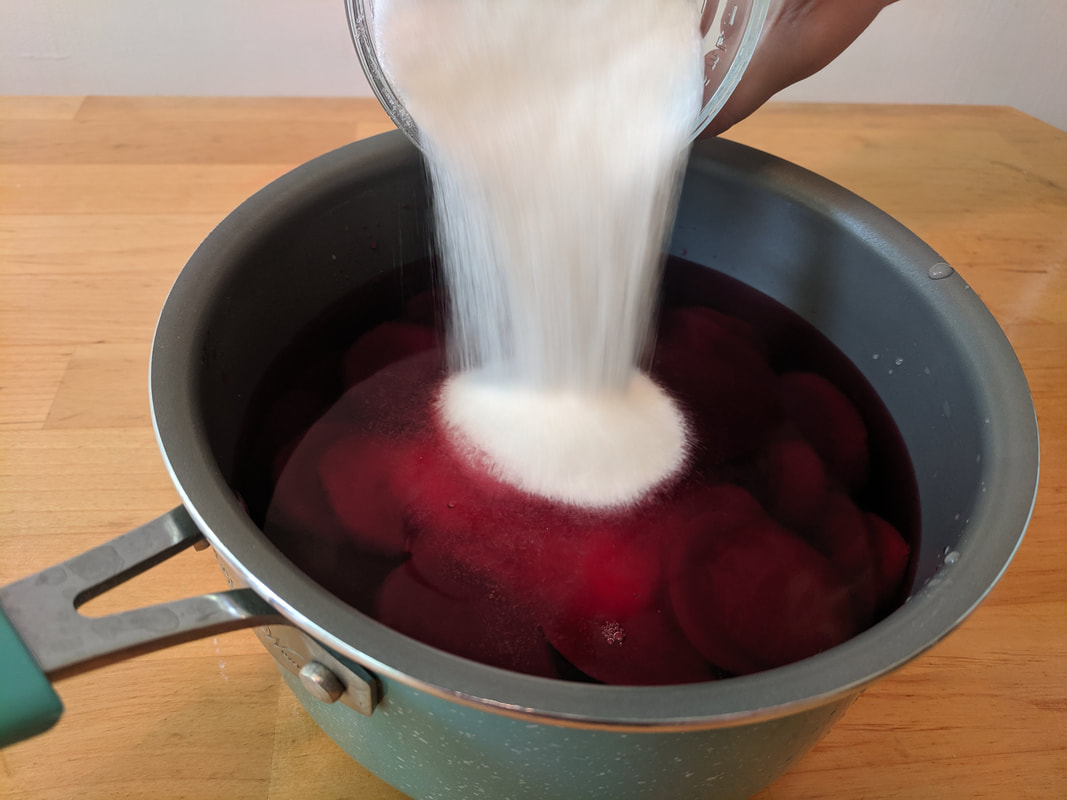 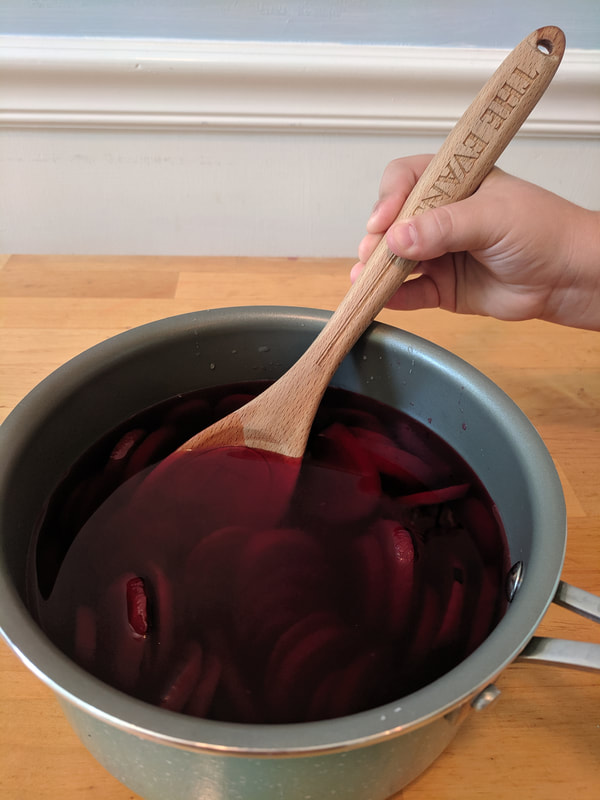 Pro Tip: To save time, you can cook the beat mixture while waiting on the eggs to cook. 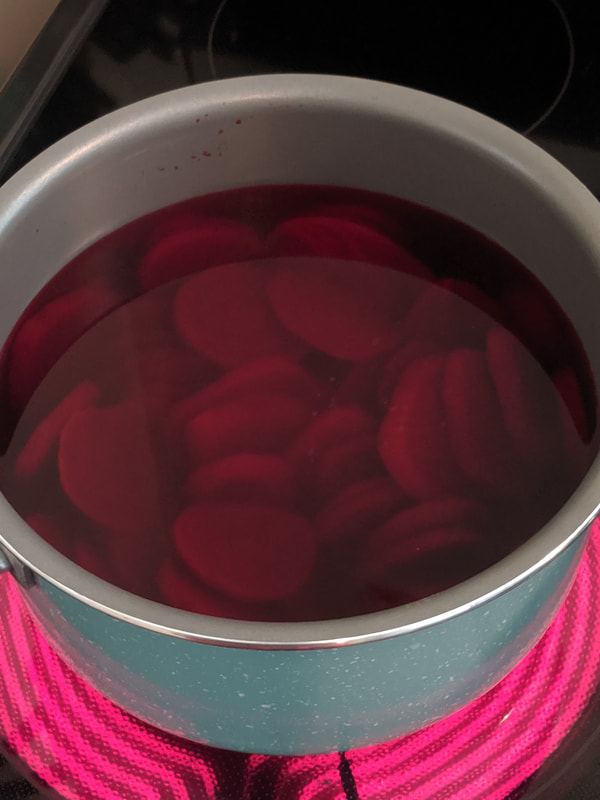  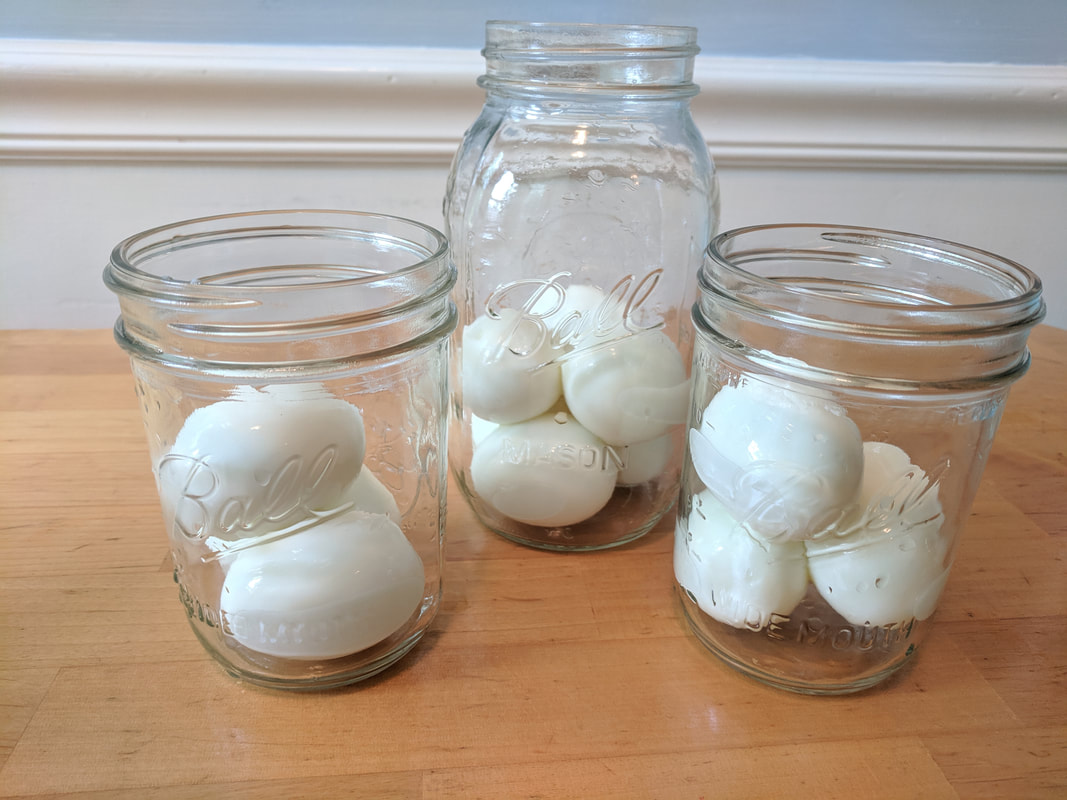 Pro Tip: I recommend the wide-mouth mason jars. It is easier to pour in the ingredients as well as scoop out your beets and eggs for you to enjoy. Walmart sells them here. 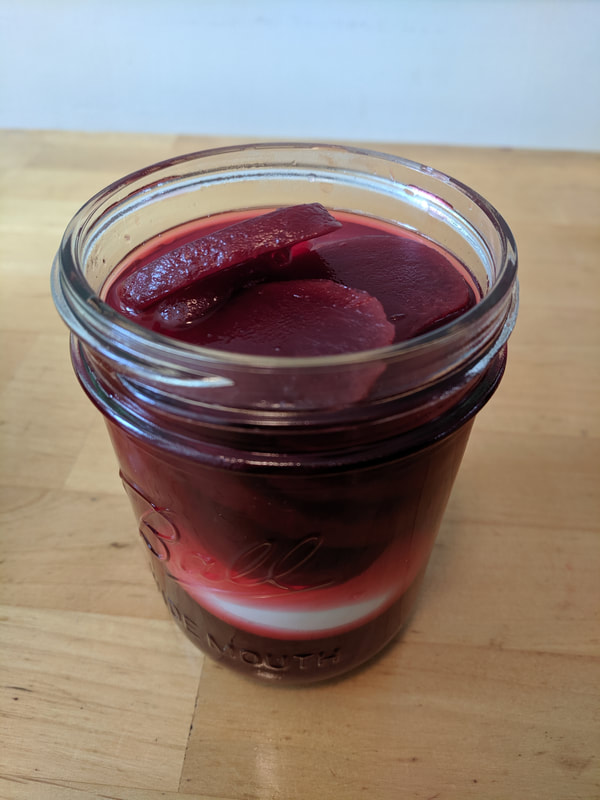 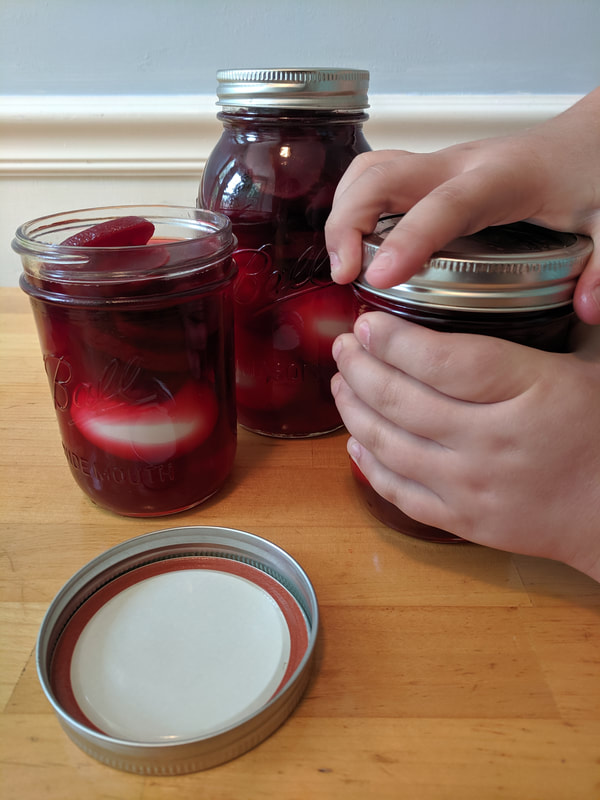 Pro Tip: Using a few smaller canning jars instead of one larger one fits better in the refrigerator. 
Hope you enjoyed the recipe for pickled eggs. Cheers! 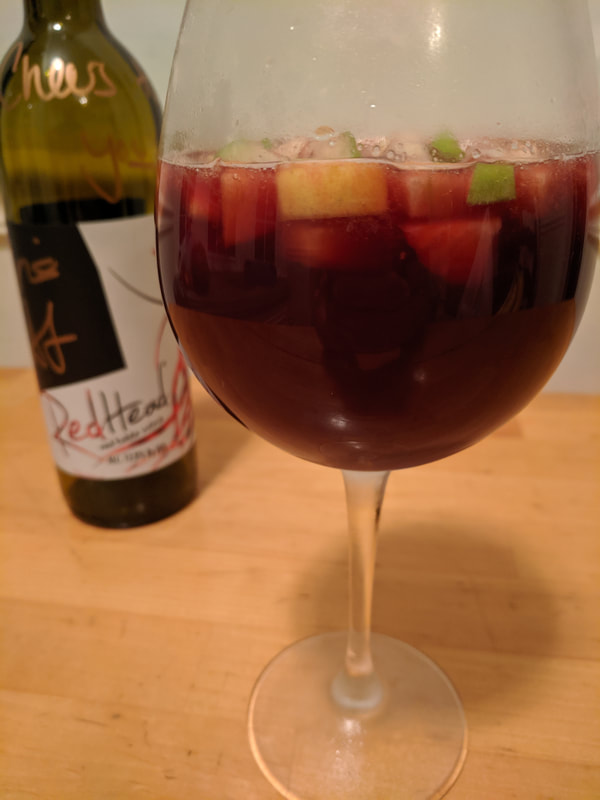 Let me begin with the disclaimer that although I am a foodie, I am pretty picky as well. I will follow up with some great news: this drink is not only easy, but it is delicious! In the summertime, there is nothing better than a cool, refreshing, sweet tasty beverage... but not too sweet! There is a fine line between refreshingly sweet and a five-year-old's first attempt at a lemonade stand. Because I'm being remarkably candid in this first blog post, I will also admit that the roots of the recipe are not my own. My attempt to create sangria came from the maker of this RedHead wine, Marisa Sergi. I first met Marisa, founder of RedHead Wine, this past year when she was also recognized as a Top 25 Under 35 nominee by the Mahoning Valley Young Professionals. It was an honor being recognized among so many talented young professionals from the Mahoning Valley! Her wine is now being sold in retail locations across the tri-state area, including Walmart. You may notice in these pictures that my bottle has some additional gold writing, because Marisa likes to leave messages on select bottles when she visits any retail location that carries her wine. I was lucky enough to score this one! Long story short, I follow Marisa's updates on social media and she posted a video recipe for sangria. When I was in Walmart earlier and saw her well-wishes written on this bottle of red blend, I knew I was going to be making sangria tonight!  As you will notice, I gravitate towards easy recipes. So here is what you need: Shopping List
*For this recipe I used: one granny smith apple, one ambrosia apple, one peach, and five large strawberries. 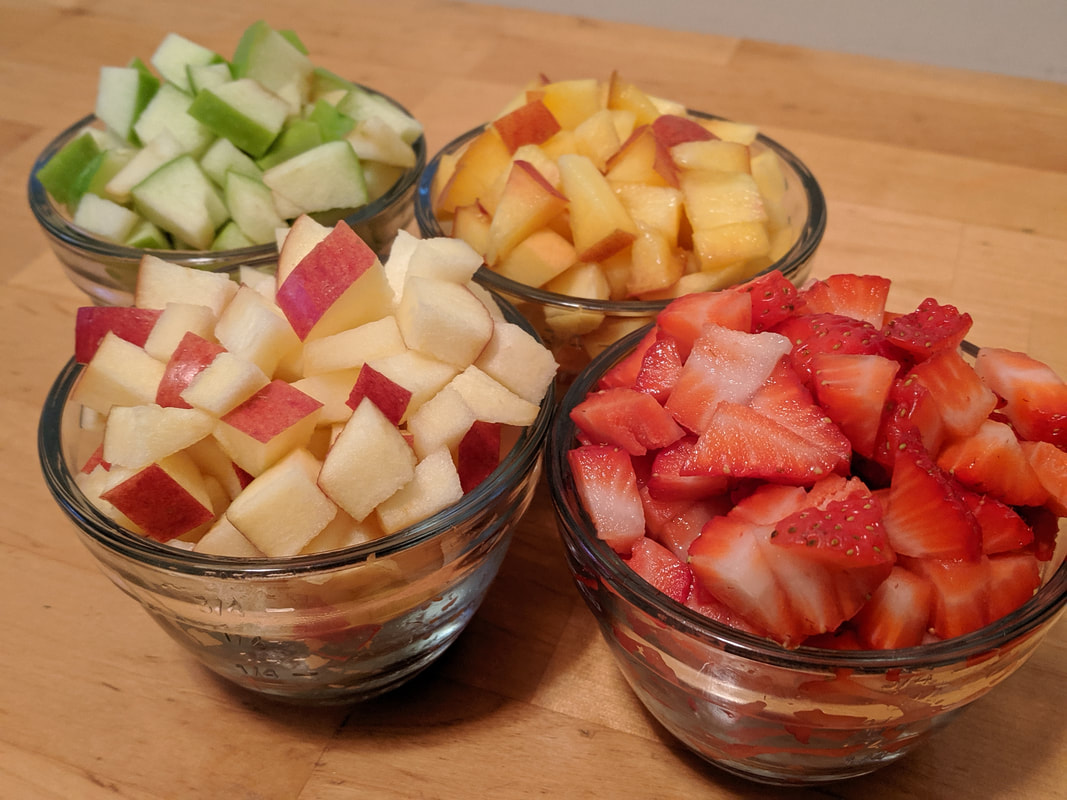 Pro Tip: Cut up your fruit into small pieces; this helps when pouring and drinking your delicious sangria! I used about four cups of fruit overall. If you don't want a layer of fruit in your drink, you can easily cut this back to 2-3 cups of fruit. I think part of the fun with drinking sangria is enjoying the variety of fresh fruit that has been marinating in the sangria. 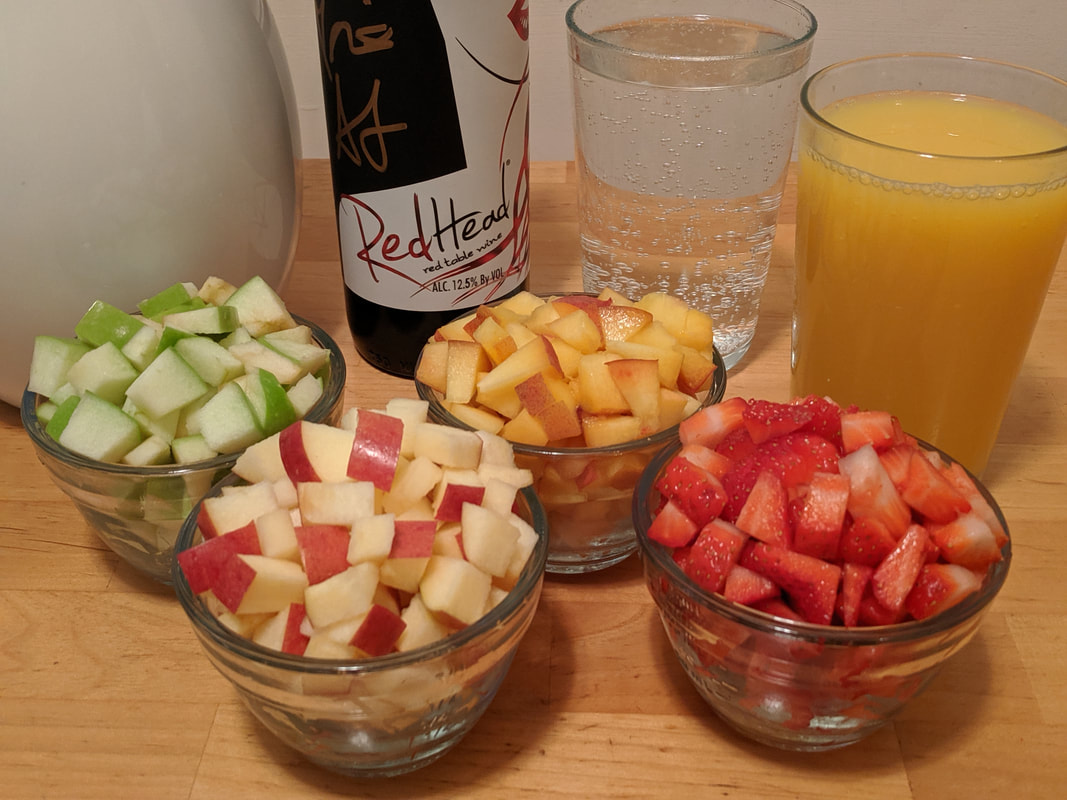 Total Cost: Under $20 Prep Time: 15-20 minutes Instructions: 1- Chill wine, soda pop, and orange juice in freezer while prepping the fruit. 2- Dice up a variety of your favorite fruits. 3- Pour in chopped fruit followed by the bottle of red wine. 4- Stir the fruit and wine mixture. Let stand for a few minutes. 5- Pour in the glass of orange juice (approximately 1-3/4 cup) followed by an equal part of 7-up. 6- Stir sangria mixture and place in refrigerator until ready to serve. Pro Tip: When pouring the soda pop into the pitcher, hold the pitcher at a 45-degree angle. By pouring against the side of the pitcher, it won't deplete all the carbonation in the beverage. Thanks for reading! Comment below with your thoughts and if you try it, let me know what you think. |
AuthorWhen I'm not on campus, there is a chance I'm in the kitchen with my daughter. I have a few go-to recipes, many of which she loves to help with. The original purpose of my blog is to catalog my recipes so I can find them easily! When I quickly run out of recipes, we may experiment with some new ones. Hopefully you will find that the recipes are easy and can be recreated by almost anyone. ArchivesCategories |
 RSS Feed
